17 July 2017

Artwork for banner I LOVE FROGS

I LOVE FROGS - regular posts about all things froggy! Please bookmark and check back for more.

We're back again with party idea no 2. Download and print this black and white drawing. Give out prizes for all those taking part. Best colouring. Best names for the frog. Best new bugs etc.


          #2. COLOURING IN FROG PICTURE          

black and white illustration of froggy catching insects


colour illustration of froggy catching insects

I've included the original full colour illustration for your inspiration. Yours doesn't have to be a moonlit scene tho. Try adding your own extra bugs for the frog to catch. Try adding some wacky patterns to the frog.

DON'T FORGET TO CHECK OUT THESE OTHER FROG PARTY IDEAS


13 July 2017

1.So let’s get started and kick off the launch of this new blog with an information packed tutorial - understanding and using Photoshop brushes.This blog post will be in 2 parts starting with these NINE top tips .........


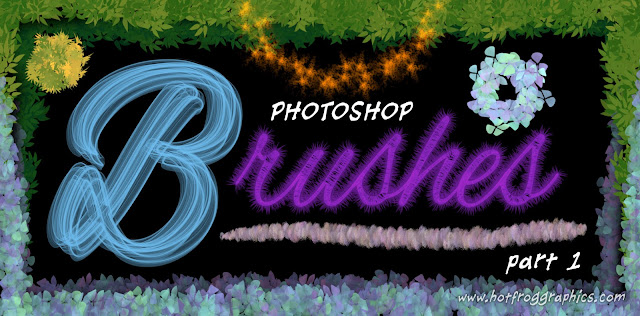
title banner for 9 free Photoshop Brush tips


Photoshop is one of the cornerstones of digital art, so ubiquitous, there can be few illustrators who've not experienced the software at some stage in their career. Here’s the first of two blog posts on customising brushes in Photoshop to create unique textures. Anyone who has used Photoshop will know that it boasts some great illustration tools. Its basic set of brush tools allows you to airbrush very convincingly and if you care to dig a little deeper, you'll find the natural (and unnatural) media brushes that are provided in the package. With perseverance you can learn how to customise these tools and create your very own, resulting in virtually unlimited possibilities - such as the ability to paint with grass, cloak a creature in fur, paint foliage on a tree, airbrush wisps of smoke, snakeskin, glitter, barbed wire, etc etc. 
Take a look at the illustration that heads this article. Click to enlarge. Every mark you see on there has been created using a customised brush. I'm going to show you how to achieve this and I'll also give you the settings for some of those brushes so that you can try them for yourselves. 


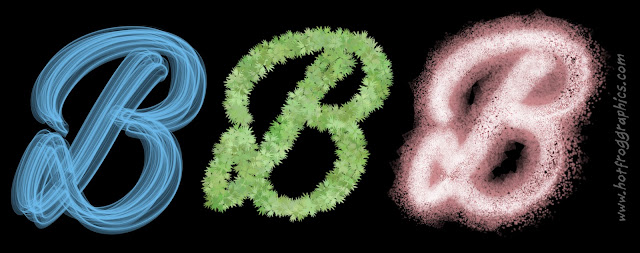
examples from 9 free Photoshop Brush tips


First let's check out the most basic of brushes and get a grasp of their functionality. There are hard edged and soft edged brushes, and a variety in between. Typically, pencils are hard edged with no anti aliasing ie. no soft edges. I find it useful to view my onscreen brush tip as 'normal size' or 'full size'. Then, as you're working, you see a ring indicating roughly the size of the tip you're dealing with. Much clearer than the standard cross-hair cursor. To do this, go to Photoshop preferences and choose 'Display and Cursors'.It's also useful at this stage to appreciate how important it is to use a graphics tablet and stylus such as Wacom, in order to master the natural look of each brushstroke. It's understandable for newcomers to be a little cautious at first, but try signing your signature on screen using a mouse. Then with a stylus. There's no contest. 


2. 9 Free Photoshop brush tips   


So with the brush tool selected, go to Window/brushes (or F5) which opens the 'Brush Palette'. Choose, for example, a fairly large, hard edged brush.


Picture 1 - shows our hard edged brush stroked firstly with a mouse then with the tapered elegance created by using a stylus. 


step 1 example Photoshop brush tips


With the 'Brush Palette' open it's here's where you can choose the size and style of brush from the drop down list. Make sure you take note of the mini palette called 'Brush Presets' as this is where all the brush alchemy takes place. 

 With 'Brush Tip Shape' selected, look at the bottom of the long palette and you'll see controls for brush spacing, brush size, softness and brush angle controls. To squidge the shape and angle of the brush (not terribly useful, but you may as well know how) use the cross hair control. 

All the changes you make get a mini dynamically updated window at the base displaying your current brush stroke. 

Picture 2 - shows how the round brush has been squidged, more obviously apparent when painting in various directions. 


step 2 example Photoshop brush tips


As you paint with any brush, Photoshop spits out a series of dots of 'paint' at regular intervals. Lots of frequently emitted dots produces a solid line of paint. But if you slow down and control the frequency of the dots, you'll get...a dotted line. 
step 2 example Photoshop brush tips

Picture 3 - painting with regular dots at regular intervals is ok for regular graphic and decorative work, but if you're striving to get 'natural,' then we need to mix it up with a few random factors. Let's make our rows of squashed dots become random sizes.

continues next page ...


3. 9 Free Photoshop brush tips   

Picture 4 - shows how 'Shape Dynamics' gives precise control over the min and max size limits of our dots, with 'Size Jitter' mixing them around between. 


step 4 example Photoshop brush tips

And rather than keep these random dots flowing in one continuous line, let's try and disturb their flow.

Picture 5 - shows how 'Scattering' allows the dots to fall either side of our continuous line and using blue and green as foreground and background colours, we can also randomise the colour of our dots by using 'Colour Dynamics'. 

step 5 example Photoshop brush tips

All we've done here is ask for blue and green to alternate as each dot is painted (jitter at 100%), but if the jitter was set at 30% for example, we'd get various tones of blue through green as we 'sprayed' with colour. Additionally if you turned on 'Hue Jitter', you'd get complementary colours thrown into the mix. At its most extreme, you could paint with rainbow coloured dots. 

The total control over this randomness, which affects the scattering, the intensity, the direction, the opacity, the purity of colours and more, can all be further influenced by the pressure sensitivity of the stylus. As you draw on the tablet, a change of pressure can alter most of these effects, as can the initial direction that you begin to paint in. It's bewildering, but now that you've got so far, you hopefully have a grasp of the fundamentals. 


But who wants to paint with dots all the time? (latter day digital pointillists maybe), because no matter how much we mix up these variations, the dots are still dots. But if you pick one of PS media brushes such as chalk, pastel, crayon, etc then it starts to look a whole lot more natural and very practical for 'real' illustration work. 

Let's choose one of the chalk and pastel brushes. At the bottom of my list of brushes I've adapted and customised one of PS pastel brushes and re-named it 'best new pastel'. 

Picture 6 - if you zoom in and inspect a single brush 'dab' (created with a single click of the mouse) instead of a dot, it looks like this…  

step 6 example Photoshop brush tips


4. 9 Free Photoshop brush tips 


In the second half of this post on brushes I'll show you how to create such a brush from scratch, but for now we'll experiment with my 'best new pastel'. As you can see in the brushstroke window, it's pretty useless until you start refining the control settings. 


Picture 7 - after a few minutes experimenting, that very same brush now looks fairly convincing as a soft chalky pastel and uses colours that interact with each other.

step 7 example Photoshop brush tips
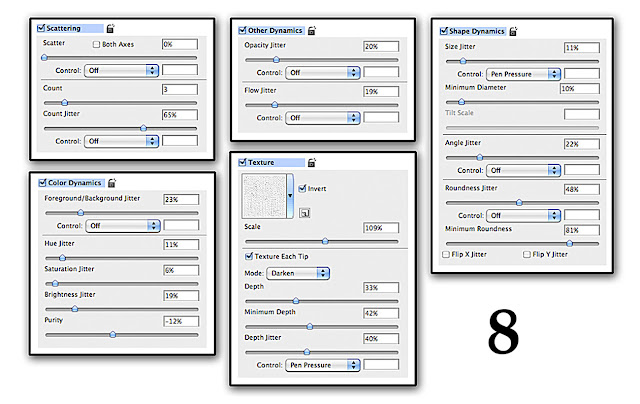
Picture 8 - shows the settings I used to replicate the pastel effect of Picture 7 


step 8 example Photoshop brush tips

You'll notice that the preset control for 'Texture' is now also active. Via that preset, there are 100s of possible textures to try out. The size of the texture along with its depth, plus subsequent pen pressure, can determine if the colours 'bleed' into the texture, sit on top of it, or completely obliterate it. 

Picture 9 - the final picture in part one of this post shows pastel brush strokes laid over a few different textures of various sizes. The 'mesh-like' strokes top left are achieved by using 'Dual Brush' controls which I'm not going to explain in this tip for beginners, but basically, it allows 2 brushes to mix and interact with each other. Coooool!


step 9 example Photoshop brush tips

You should now be able to explore any brush and make some reasonably useful marks with them. Once you have experimented and found your perfect pastel, or emulated your favourite Karismacolour pencil, charcoal, ball-point pen, etc etc, don't be surprised that it's not in your brush palette next time you open up PS. 
*If you don't SAVE your new brush, I'm afraid all the experimenting and refining has been for nothing. So it's crucial to regularly go to Brushes and using the tiny right-facing arrow top right of the palette, you'll see a drop down list. From that list choose 'New brush preset' and name and save your new creation. 

Next time I'll show you how to create your own unique brushes and show how they can be, and have been, used in many professional illustration work.
If you’d like to see lots more examples of my illustration work and some of these brushes in action, look no further than my Hot Frog illustration showcase.

And if you’d like to actually OWN some of my artwork please head over to my Zazzle shop where you’ll find posters, cards, cushions, in fact more than you can imagine! Some excellent quality products on show.
Catch you next time.

Here's a handy graphic to download as a reminder

Graphic panel showing Photoshop brush tips from HFG's blog of same


12 July 2017

Artwork for banner I LOVE FROGS

I LOVE FROGS - regular posts about all things froggy! Please bookmark and check back for more.

Frogs are your thing right? Or maybe they come in the top 10 of your little one’s favourite creatures. Well, how about treating them with these great frog party ideas to help keep the froggy fun flowing and the croaks of laughter following?
Please check back every week or so, as I will be posting up more fun froggy party ideas, including games, magic tricks and exciting free downloads. But right now let's start with ...


          #1. INCREDIBLE EDIBLE FROG SPAWN!          

Make your own incredible edible frog spawn! 
It looks amazing and tastes even better. You will need ...
Spherical ice cube tray
1 pack lime flavoured jello (US) - jelly (UK)
handful of blueberries, measuring jug
stirring stick, refrigerator

Photograph 1 of 11  How to make edible frog spawn

Unwrap and prepare the Jello. I find it quicker and easier to snip the chunks into small pieces using scissors.
You can even afford it eat a bit as you do this! : )
As you can see my blueberries are frozen but don't have to be.

Photograph 2 of 11  How to make edible frog spawn

This next bit is important. Follow the instructions on your particular brand BUT you shouldn't use as much hot water as it suggests to melt the pieces. At least HALVE what it recommends and maybe even a bit less than that. You want the resulting Jello to come out of the mould stronger, more concentrated, and much firmer than normal.


A short blast in the microwave helps melt the pieces more quickly. Once mixed thoroughly and dissolved, pour your delicious smelling liquid lime Jello into the bottom half of your spherical mould, almost to the top. 
And then ..... wait!!!!! 
Yes, this is the boring bit, you need to let the mixture start to set before adding your blueberries.
The time will vary from brand to brand so just be patient.

Photograph 4 of 11  How to make edible frog spawn

Now comes the only tricky part. If your Jello has 'semi set' to just the right consistency it will be a thick liquid and a bit wobbly. You will be able to plop each blueberry into place smack in the middle of the circles. Sometimes they float out of position so wait until you've placed all of them and then using a cocktail stick, or similar, gently push them into place.

Photograph 5 of 11  How to make edible frog spawn

Once you're happy with their positions, drop the top half of the mould smartly on top and begin pressing down, forcing out the excess liquid Jello. Don't worry about making a mess you can lick (I mean clean) it up afterwards.

Photograph 6 of 11  How to make edible frog spawn

Pop it into the refrigerator for about an hour or more and then the best bit is opening up the moulds to reveal your perfect Jello spheres. With this particular mould I use a round knife tip to gently prise it apart.


Photograph 7 of 11  How to make edible frog spawn

If your Jello is just the right consistency you will be able to gently tease and ease the balls out of the lower half of the mould taking care not to rip off the top half.

Photograph 8 of 11  How to make edible frog spawn

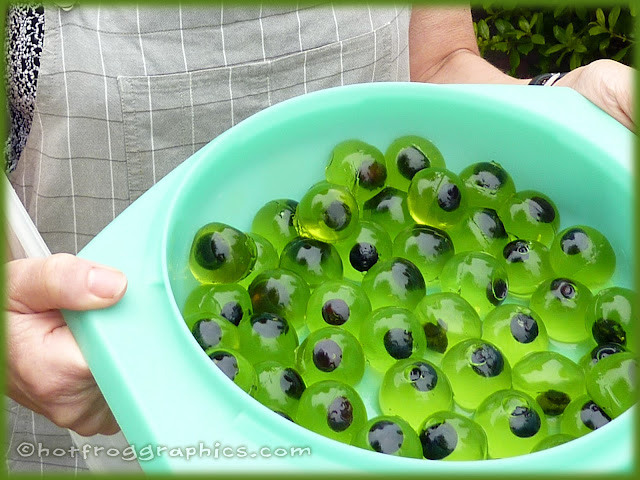
Pretty amazing and realistic huh?
AND if you want to see how this compares to actual frog spawn, CLICK HERE!

Photograph 9 of 11  How to make edible frog spawn

The incredible edible frog spawn looks great when served with ice cream, or make lots and simply pile it in a great heap and let the party goers dig in. 
*Or for adults only - why not add a measure of your favourite spirit into the initial mix and serve in shot glasses!!??

Photograph 10 of 11  How to make edible frog spawn

I hope you enjoy making this incredible edible spawn and remember to check back each week or so for more froggy freebies and great ideas.

Photograph 11 of 11  How to make edible frog spawn


why not download this handy graphic as a reminder ...


Please add a comment if you've enjoyed this!
If you're on the look out for fantastic frog-themed party ideas then please also check out my Leaping Frog goodies in the online Hot Frog Art Store at the top of this page.